I love my son’s tantrums

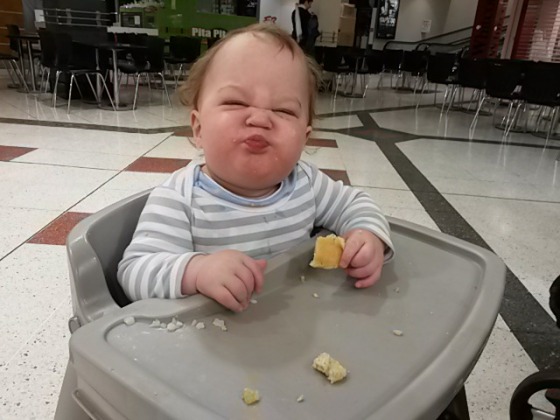
2013-09-11 08.23.39My son exists in a world where having his hair brushed, or being presented with the wrong selection of snacks, or having his arms put through his sleeves are the worst things in the world to him. And that makes me incredibly glad. Not for his distresses of course, for those I sympathise (it must be difficult being a toddler) but it makes me glad because he is still so innocent and so beautifully self centered.

I know it sounds crazy but I just adore how he thinks the world revolves around him – and in our house it does. Infancy is a tiny pocket of the human life span where for just a moment, you are the center of everything and I think that it’s an important phase to have. In time our children learn about others, about empathy, about kindness and selflessness. They will learn how to share and negotiate and communicate their wants and needs in socially accepted ways. And that’s good. As we grow up we need to know these things, they are an integral part of existing in our culture.

But you have admire the toddler for their self expression and ability to just be. No pretenses, no motivation, they just are as they are. I love my son’s tantrums over trivial things as it shows me his innocence. His blindness to the harsh things in life.I love that he is silly and selfish and sassy.  His spirit, no matter his mood continues to amaze me and even though the tears can be hard to deal with, I love knowing that the worst thing he will have to face today is having to wear sleeves.

Sticky table {toddler activity}

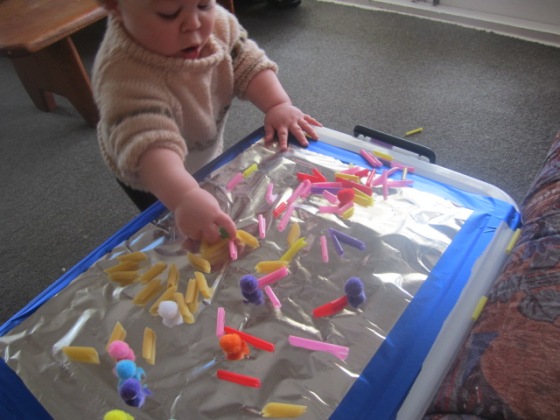
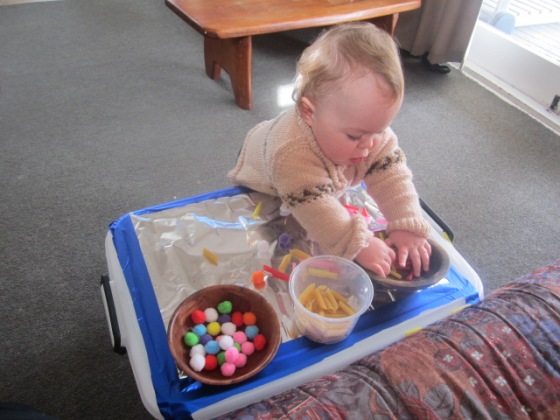
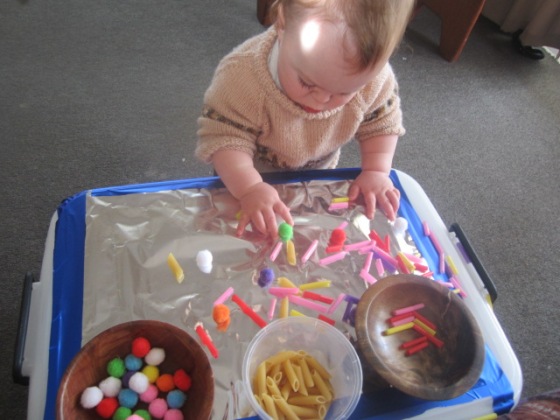
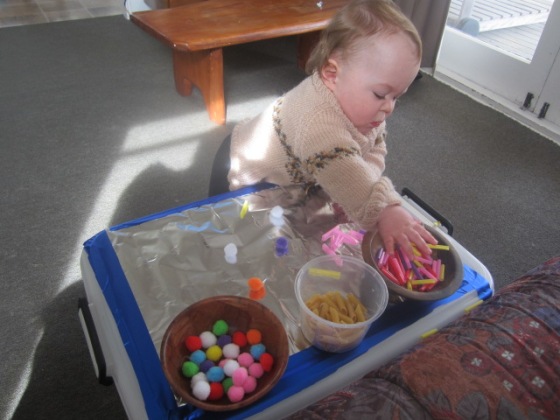
A few weeks ago, I wasn’t feeling very well so naturally I had a very busy, very bored baby on my hands. He was tired of his toys, didn’t want to read books or sing songs. I had a few things left from his birthday, so I put together a sticky table to keep him occupied. It worked a treat!

IMG_0647

I used contact paper and my trusty rolling container (seriously, these bad boys are the epitome of multipurposeful…ness) some pom poms, penne pasta and bits of cut up straws.  I laid them out like this and showed Charlie what happens when you place an object on the table and try to pull it off. He got into it straight away and had fun experimenting with the different materials, scattering and pulling at them.  He had such a blast and I got to put my feet up for a few minutes… bliss!IMG_0656

IMG_0649IMG_0652

Folding a fitted sheet

Credit:Ammgramm/Flickr/Creative Commons

Credit: Ammgramm/Flickr/Creative Commons

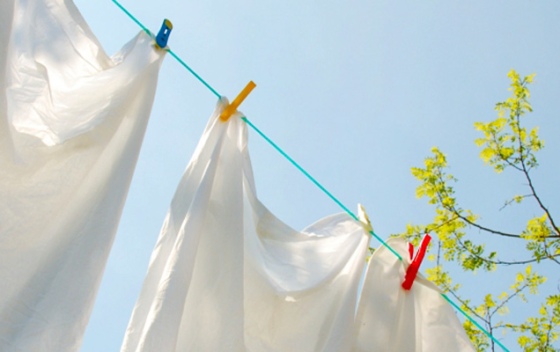
I began thinking about this as I opened my brand new bed sheets, gifted to me by my nanna for my twentieth birthday. Upon taking them out of their packaging, I admired their crispness (things like that give me shivers and I have no idea why) and . Thinking how lucky I was to have received such a beautiful present, I began to make up the bed.

As I unfolded the fitted sheet, I wondered if I could ever get mine to look like that; nice and neat and flat. As I looked over at the tangled mess of dirty linens on the floor, I shook my head and decided that I probably couldn’t. Smoothing over the top sheet, I remembered a photo series I found online a while back, demonstrating how to correctly fold a fitted sheet. I also remembered my failed attempt which resulted in me balling said sheet and shoving it in the cupboard to be forgotten until needed again.

As I put the pillow cases on I wondered if maybe there was ayoutube video I could follow, I always find videos easier to follow along to. So later that night, after my old sheets had been washed and dried, I found this video and gave it a go. After a few attempts I got it and a strange wave of satisfaction washed over me. No longer would I simply scrunch up my sheets and be done with it. No – instead I would take the time to fold and care for them properly (however, once you learn how to do it, folding them correctly doesn’t take much time at all!)

The trick is to get all the corners folded into each other. It sounds confusing but it’s really not. Here’s how to do it in 10 steps: (for pictures, go here)

  1. Stand with the sheet longways in your hands, right side facing you.
  2. Find the corners and hold one with each hand.
  3. Take the right hand corner and tuck it underneath the one in your left hand.
  4. Run your hand down the edge of the next untucked corner. Find the corner and bring that to your left hand too.
  5. Repeat this process with the final corner. By now, you should have all the corners folded together on your left hand.
  6. Straighten the edges of the sheet.
  7. Take to a flat surface and lay out. Smooth over the corners.
  8. Fold the remaining length of the sheet into thirds or quaters, being careful to keep the corners together.
  9. Fold the now narrow sheet into thirds or quaters again.
  10. Put the outer sections over each other so it will stay securely folded!

And there you have it! The correct way to fold a fitted sheet. If you’re having trouble following those instructions, do check out this video! I found it so helpful! At first when I watched her do it I think I swore and called her a “sheet wizard” but after a few watches, I was able to follow along and successful fold my sheet! Wohoo!

Do you have trouble folding sheets? (or folding laundry in general?)  Leave a comment and let me know!

DIY carpet spot cleaner

0823d

Babies. They make a lot of mess, don’t they? Especially on carpets! We have recently scuttled into the crawling phase and like a snail, our little one leaves a trail of food, dribble and spit up wherever he goes!  We have a mat that he is *supposed* to play on, though he seldom does. As a result, each day my carpet gets covered in a variety of spots, stains and little baby smudges… Lucky me!

I wouldn’t call myself a greeny (though, I do try and be enviro-friendly when I can) but I have been hesitant to use a chemical based spot remover. The reason for this is that Charlie spends so much of his time on the floor crawling around and I don’t want him licking up any of those nasties while he’s exploring. So, for a while now I have been searching for an easy to make carpet cleaner that is cheaper, safer and (hopefully) more effective than ones found in stores and supermarkets. After a few failed attempts (one which actually left my carpet worse off!) I wondered if I should give up and pay double for an eco-friendly carpet cleaner instead. I had almost given up when I found this .

It was easy to make, I had everything on hand and worked like a charm! I have a bottle stored in the cupboard and when I see a spot, all I need to do is give it a quick spritz, wait a few seconds and rub! It really as that simple! Here’s how to make it –

You will need:

  • A small spray bottle
  • 1tsp dish soap
  • 1tbsp white vinegar
  • 1c warm water
  • 1tsp baking soda

Get all your ingredients together and assemble near a sink. Start by adding the dish soap and vinegar to the spray bottle, then add the water. Lastly hold over sink and add the baking soda, quickly screwing on the top after (you remember those baking soda/vinegar volcanoes, right???) To use, spray and spot and rub gently with sponge, then dab with a towel. Continue doing this until stain is gone!

Sensory play: Bubbles and soap

I’m a self-confessed bubble addict and it seems Charlie is headed the same way! It has been so hot these past few weeks so we’ve found ourselves in the yard a fair bit and I thought it would be a … Continue reading

Colour play: Blue water fun!

This morning Charlie and I continued our “Colour Journey” with this activity – Blue Water Fun! We had a great time and it was a perfect day for it too! For this activity you will need: A bath. You could … Continue reading

Housekeeping and home-making

A new year, a new house, a new home. 2013 holds so much promise for us, and I am so excited. We’ve begun packing up our little flat and small though it is, we have so much stuff. It got … Continue reading

Colour play: Blue Discovery Box

This was a fun activity Charlie and I did yesterday. A few weeks ago, we discovered that he likes the colour blue. He always favours blue toys and if he sees something blue, he’s guaranteed to want to touch it. … Continue reading

My first attempt at making bandana style dribble bibs

For about a month, we’ve noticed that our sproglet has become one dribbly little monster! And he’s not even teething yet! Like many parents, we’ve fallen in love with bandana style dribble bibs – they’re practical and totally stylish! My … Continue reading